Get a flawless raw polymer clay surface with simple steps: lift lint, dry smooth, brush with rubbing alcohol, use cornstarch for stickiness, and reserve acet...
Custom Silicone Push Molds for Polymer Clay Charms

Dimple
Dimple is the cheerful hamster host of Clay Bakehouse who absolutely loves transforming brightly colored clay into tiny, adorable masterpieces. Whether readers are rolling their very first clay ball or baking delicate custom earrings, Dimple is always there with a warm smile to celebrate every squish and shape.
Published · Last updated
Let's roll out some colorful clay and make something wonderful today!
If you love a charm design so much you want to make five, ten, or a whole tiny parade of them, custom silicone push molds are one of the nicest little shortcuts. You sculpt one original charm, then use a reusable two-part silicone mold to press out clean copies quickly, with consistent size and thickness.
What a silicone push mold does best
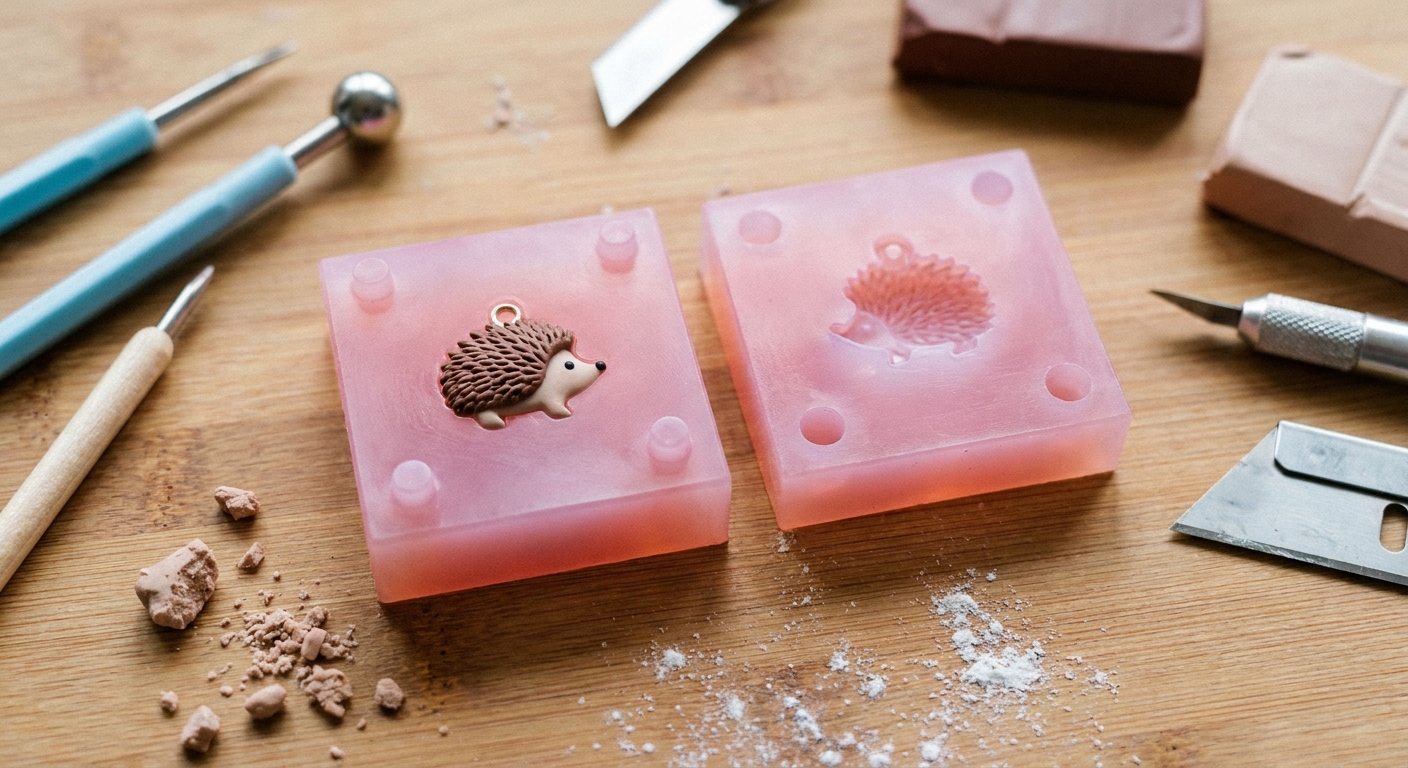
A push mold is a flexible silicone mold you press clay into, then peel away to release the clay copy. A two-part push mold captures detail on the front and the back of your original, which is perfect for charms that should look finished from every angle.
- Best for: small charms, repeating collections, consistent gift tags, keychain charms, and earring components
- Great details: raised textures, engraved lines, tiny faces, simple 3D forms
- Not ideal for: deep undercuts (silicone can lock in), very thin protrusions, or super fragile originals
If you are already making tiny characters and minis, you might also enjoy the ideas in Charms & Figurines, or a sweet beginner-friendly project like Mini Polymer Clay Macaron Charm.
Materials checklist
Silicone products vary by brand, but the setup stays the same. The key is using a two-part RTV silicone rubber made for mold-making (not caulk, not hot glue). RTV means room-temperature vulcanizing, which is silicone designed to cure at room temperature through a chemical reaction. No oven is required, and gentle warmth can sometimes speed curing depending on the product.
You will need
- Your original charm (the master): fully cured and sealed if needed
- Two-part mold-making silicone: either tin-cure or platinum-cure, with matching Part A and Part B
- Mold box materials: a small plastic food container, disposable cup, or foam board walls taped together
- Non-sulfur plastilina clay: for embedding the master and creating the first half
- Mold release: made for silicone-to-silicone release (important for the second pour)
- Mixing cups and stir sticks: disposable
- Digital scale: helpful for accurate ratios (some silicones use weight ratios)
- Optional but helpful: nitrile gloves, toothpicks, soft brush, vacuum chamber or pressure pot (advanced)
Optional: choose a good silicone firmness
If your silicone brand offers different hardness options, look for something in the medium-soft range. Softer silicone releases details more easily, but can distort if the mold walls are thin. Slightly firmer silicone holds its shape better for repeat pressing, especially with two-part molds.
Polymer clay tools for using the mold later
- Conditioned polymer clay
- Cornstarch or a tiny dab of release (optional)
- Craft blade for trimming
- Needle tool for popping trapped air
- Baking tools and a flat tile or tray. For bake setup, see Essential Oven Tools for Baking Polymer Clay.
Quick safety note: silicone and polymer clay tools stay happiest when you follow the product label for ventilation and skin contact. Silicone can be messy, so protect your table.
Step 1: Prep your master charm
Your master decides the quality of every copy, so it is worth a quick polish-up first.
- Bake or cure it completely: a soft, unbaked master can distort during molding.
- Smooth what you want smooth: fingerprints will be faithfully copied. If you need help with surface cleanup, see How to Smooth Raw Polymer Clay.
- Seal porous masters: if your master is something like wood, paper, or air-dry clay, sealing helps prevent bubbles and sticking.
- Plan your parting line: imagine where the mold splits. For most charms, the split line runs around the widest point.
Beginner save: if your charm has a “face” (a smile, eyes, a logo, a tiny frosting swirl), try to place the parting line so it runs along a side edge or a natural ridge, not straight across the most detailed area. It is so much easier to clean a seam on a belt line than across a tiny nose.
Step 2: Build a snug mold box
A smaller mold box saves silicone and helps reduce bubbles.
- As a good starting point, leave about 10 to 15 mm of silicone around the charm on all sides.
- As a good starting point, leave about 15 to 25 mm of silicone above the highest point for a sturdy mold.
- Seal seams well with tape or hot glue so silicone cannot sneak out. If you use hot glue, keep it on the mold box seams only, not touching your master or the cavity area.
Step 3: Embed the master for the first half
This step creates the first mold half and sets you up for a clean registration between halves.
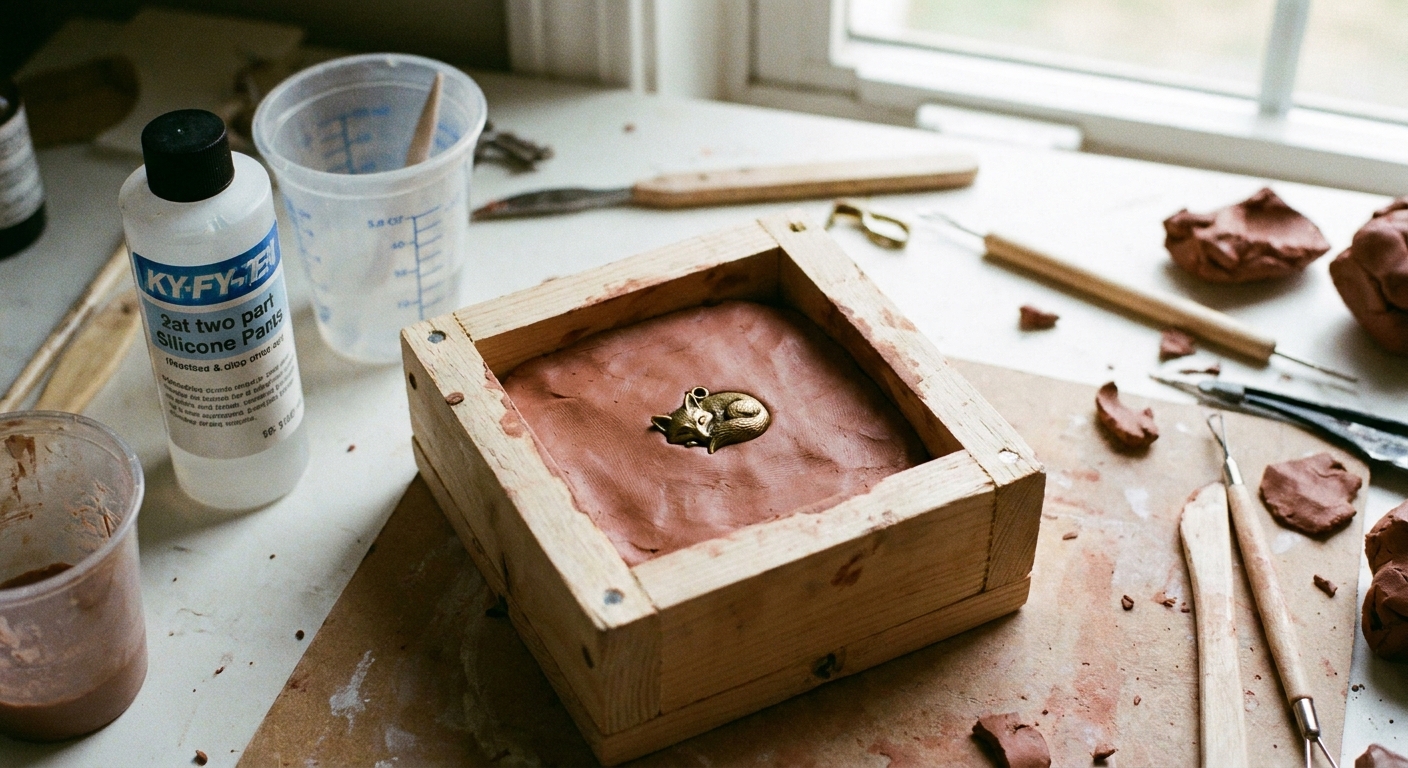
- Fill the mold box halfway with non-sulfur plastilina clay and level it gently.
- Press the master into the clay until it sits at your chosen parting line. The half that stays visible will be captured by the silicone in this first pour.
- Create registration keys: poke a few shallow dimples around the master using the rounded end of a tool or a pencil eraser. These become little bumps and sockets that help the two halves fit perfectly later.
- Add vents (optional): for very detailed shapes, you can create tiny channels from high points to the edge using thin clay snakes. Vents help trapped air escape and reduce little voids. Alignment is still handled by your registration keys.
Important: platinum-cure silicones can be inhibited by sulfur and some other contaminants, including some latex and amine compounds. Tin-cure silicone is often more forgiving, but I still like to keep everything clean. Use non-sulfur plastilina when you can, and avoid freshly handled latex near your mold setup. If you are not sure what you have, do a small test pour first.
Step 4: Mix and pour silicone (first half)
Silicone wants accuracy and patience. Follow your silicone brand's ratio and mixing time exactly.
Quick timing note: pot life (working time) is how long you have to mix and pour before the silicone starts thickening. cure time is how long it needs to fully set before you can demold. Beginners often mix these up, so check both numbers on the label.
- Measure Part A and Part B by weight or volume, whichever your product requires.
- Mix slowly while scraping the cup sides and bottom. Slow mixing reduces bubbles.
- Optional: let the cup sit for a minute so larger bubbles rise.
- Pour in a thin stream into the lowest corner of the mold box and let silicone flow around the master. This helps push air out instead of trapping it.
- Cure fully for the time on the label. Do not rush this part.
If you see bubbles clinging to tiny details, a gentle tap of the mold box on the table can help them rise. Some makers also use a toothpick to tease bubbles away before the silicone thickens.
Step 5: Flip, clean, and apply mold release
Once the first half is cured, it is time to set up the second half. This is where many two-part molds go wrong, so move slowly and stay tidy.
- Remove the clay backing: flip the mold box over and peel away the plastilina clay, leaving the master seated in the cured silicone half.
- Clean residue: pick off any clay bits stuck to the silicone or the master. A clean seam gives a clean mold line later.
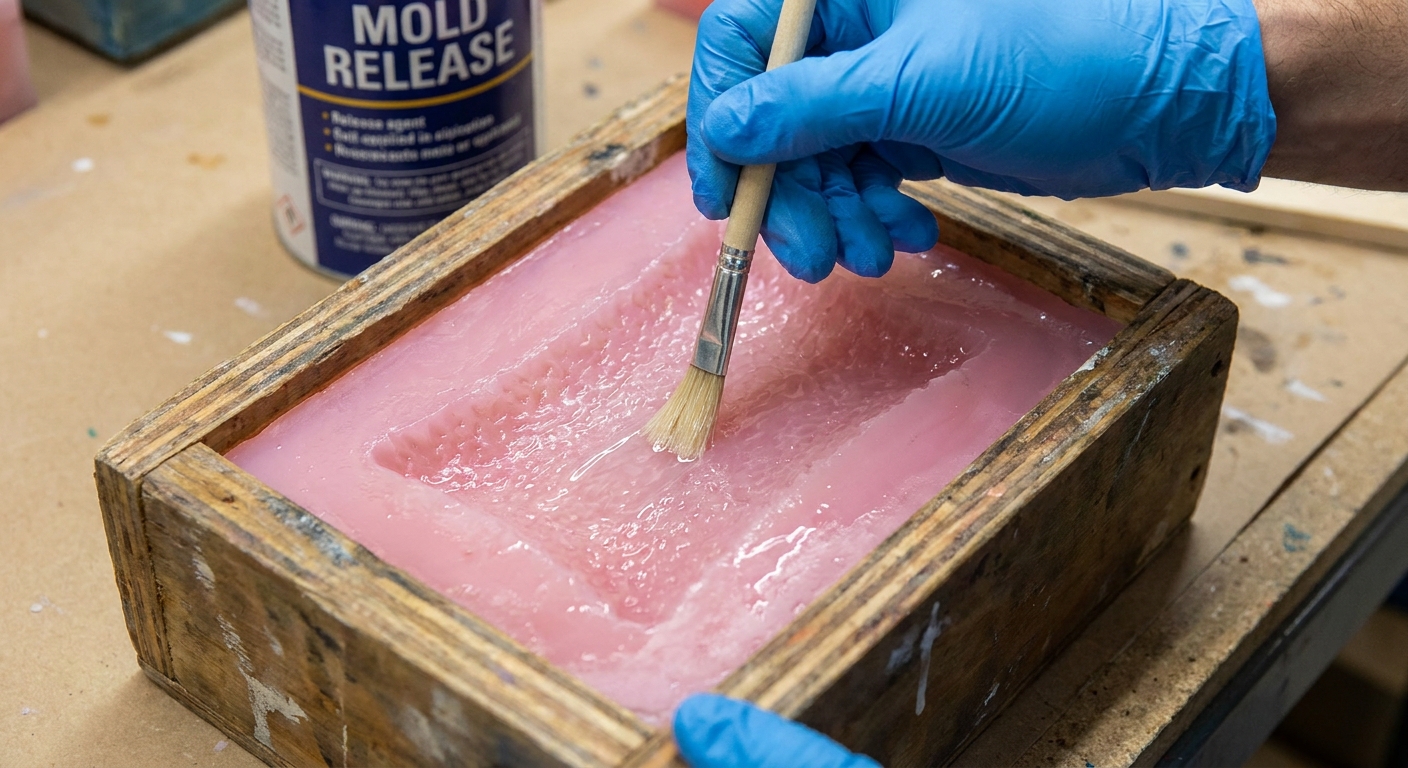
- Apply silicone-to-silicone release: coat the exposed cured silicone surface lightly and evenly, including right up to the seam edge and around any areas where the master meets the parting line. Missed spots are where the two halves love to bond forever.
Step 6: Pour silicone (second half)
Mix a fresh batch of silicone and pour it over the exposed master and the first silicone half.
- Mix accurately again, scraping the cup thoroughly.
- Pour slowly into a corner and let silicone rise over the master.
- Cure fully for the full time on the label.
After curing, separate the halves carefully. If the release was applied well, the mold should open with a gentle peel.
Step 7: Demold the master and trim
Open the mold and remove the master. Now is the tidy-up stage.
- Trim flashing: use small scissors to remove thin silicone skirts around the seam.
- Cut a clean opening if needed: for some shapes, a small zigzag cut along an outer edge of the mold (away from the charm cavity) can help the mold open and close without shifting.
- Check alignment: the registration keys should make the halves fit neatly together.
Tip: if your charm has a jump ring loop or a delicate sticking-out bit, consider molding the charm without that protrusion, then adding it to each clay copy later with a small clay coil or a drilled hole. For hole options, see Piercing vs Drilling Polymer Clay Earring Holes.
How to use your two-part push mold
Now comes the fun part: tiny copies, again and again.
1) Condition and portion clay
- Condition your clay until it is smooth and flexible.
- Portion consistent amounts for consistent charm thickness. A small ball per charm keeps batches even.
2) Optional: add a light release
Many polymer clays release from silicone without anything. If you have sticking or very fine detail, dust the mold lightly with cornstarch, then tap out the excess.
3) Press clay into both halves
- Press clay into each mold half, starting at the most detailed areas.
- Avoid trapped air: push clay into corners first, and use a needle tool to coax clay into tiny crevices.
- Overfill slightly so there is enough clay to meet at the seam.
4) Make a clean fill line
This is the little habit that keeps seams from turning chunky.
- Flatten the clay flush with the rim of each mold half before closing. You can use a blade held almost flat, or your fingertip if the silicone is firm enough to support it.
- Or use a measured sheet: roll a sheet to a consistent thickness, press it in, then trim the excess at the edge for a repeatable amount every time.
5) Close the mold and compress
- Align the keys, then press the halves together firmly.
- Hold pressure for a few seconds to let the clay settle.
- Open and check the seam. If there is a gap, add a tiny bit more clay only where needed and press again.
6) Remove, refine, and repeat
- Peel the silicone away from the clay copy instead of pulling the clay.
- Trim seam lines with a blade.
- Smooth small seams with gentle finger pressure or a tiny bit of clay softener, if your brand allows it.
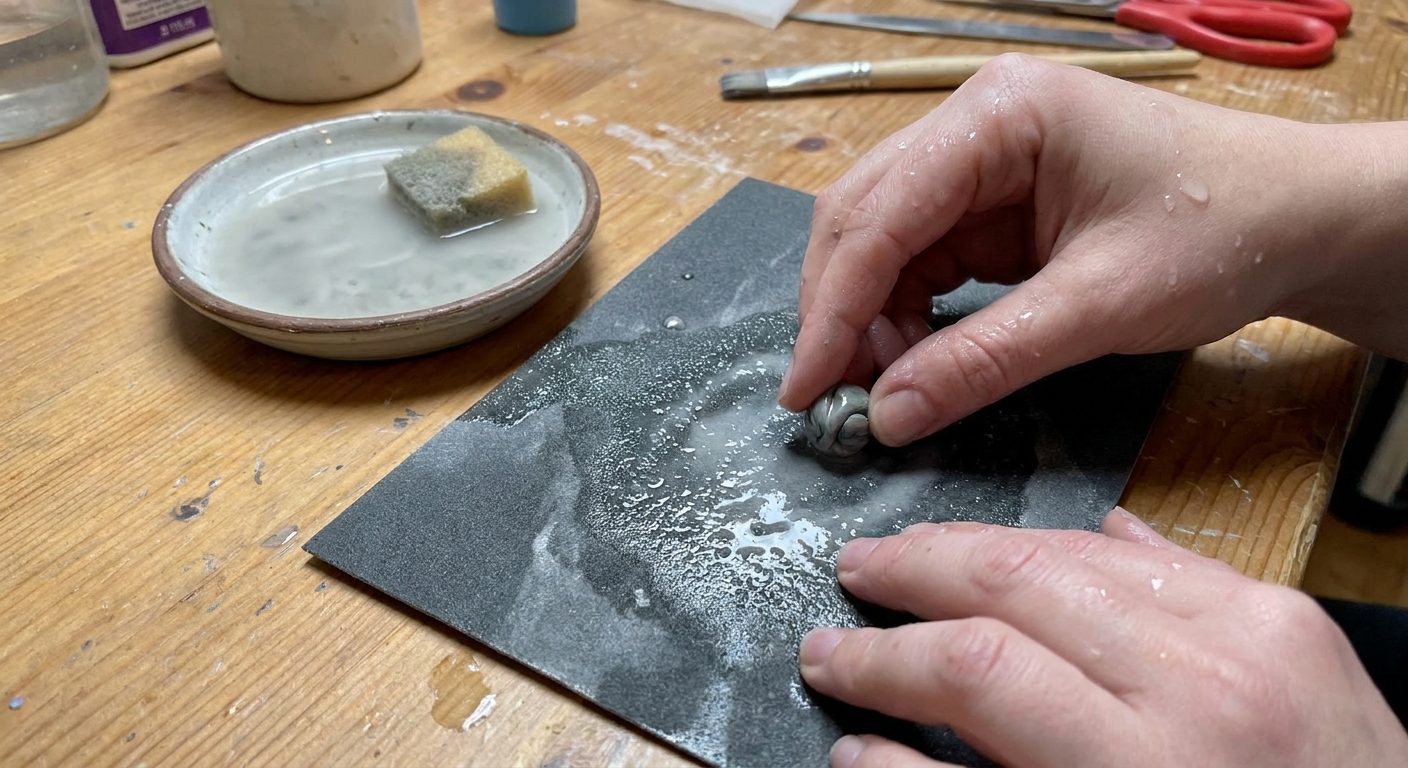
Once baked, you can refine edges further by sanding and polishing. This guide can help: Sand and Polish Polymer Clay with Sandpaper and a Dremel.
Baking copies without warping
Thin pieces and tiny details can shift if they are not supported.
- Bake on a flat, stable surface like a tile or thick baking tray.
- Support rounded shapes with a bed of baking soda or polyester fiberfill when needed.
- Follow your clay brand’s temperature and time. Underbaking can make charms brittle.
If you are baking curved components for other projects, the methods in Baking Polymer Clay on Curves for Bangles and Hoops are full of support tricks that also help small molded pieces.
Design tips for mold-friendly charms
Plan for the seam
Two-part molds usually leave a seam line. Place your parting line where it is easiest to clean, like along a natural edge, a belt line, a frosting ridge, or the perimeter of a charm.
Avoid deep undercuts
Undercuts are places where silicone hooks underneath a shape. A little is fine, but deep undercuts can tear silicone or distort clay pulls.
Think in layers
For crisp results, mold the base charm shape, then add tiny clay details on top for each batch. This keeps the mold simpler and makes each charm feel special.
Texture helps a lot
Even simple shapes look adorable with surface texture. Household textures are a treasure chest. For ideas, visit Realistic Polymer Clay Textures with Household Items.
Common problems and quick fixes
My silicone stayed sticky or never cured
- Incorrect ratio or poor mixing can prevent curing.
- Platinum-cure silicone can be inhibited by sulfur and other contaminants, including some latex and amine compounds. Use non-sulfur plastilina and keep the work area clean.
- Some materials can inhibit certain silicones. When in doubt, seal the master and run a small test.
Lots of bubbles on the charm surface
- Pour in a thin stream into a corner so silicone flows around details.
- Brush a thin layer of mixed silicone onto the master first, then pour the rest.
- Tap the mold box gently to encourage bubbles to rise.
The two halves slide and misalign
- Add deeper or more registration keys next time.
- Use rubber bands around the mold when pressing clay, or press on a flat surface to keep it square.
Clay sticks in the mold
- Soft or warm clay can cling more. Let conditioned clay rest for a few minutes so it firms up slightly.
- Try a lighter press if your clay is very soft. Over-compressing can sometimes encourage sticking in fine detail areas.
- Dust with a tiny amount of cornstarch and remove excess.
Seam line looks chunky
- Trim the clay flush before closing the mold so excess has nowhere to squish.
- Use less clay, then add a tiny snake only where there is a true gap.
- Trim with a sharp blade before baking.
- After baking, sand lightly and polish for a clean edge.
If a baked piece cracks during cleanup or assembly, this repair guide can help: How to Fix Cracked or Broken Baked Polymer Clay.
Caring for your silicone molds
- Wash gently: mild soap and water, then air dry fully.
- Store flat: keep halves together to prevent dust sticking inside.
- Avoid heat: do not bake polymer clay inside most craft mold-making silicones unless the silicone is specifically rated for that temperature range. Polymer clay often bakes around 110 to 135 C (230 to 275 F), so always check your silicone datasheet before it goes anywhere near an oven.
- Keep it clean: polymer clay contains plasticizers. Silicone is usually fine, but long-term oily buildup can attract lint and soften details. I store my clay separately from the mold and give molds a quick wash if they start to feel slick.
For general clay organization habits, Best Storage for Unbaked Polymer Clay is a handy read.
Batch workflow
When it is time to make a whole charm family, a simple assembly-line rhythm keeps things neat.
- Prep clay portions for the whole batch first.
- Press all copies and place them on a tray.
- Trim seams in one pass.
- Add holes or hardware points consistently. For findings and rings, see Jump Rings and Pliers for Clay Earrings.
- Bake together with consistent timing.
- Finish together with sanding, glaze, or matte buffing. If you want a protective coat, Polymer Clay Glazes Explained breaks down options.
FAQ
Can the master be polymer clay?
Yes. A fully cured polymer clay master is a common choice for silicone molding. Smooth it first so you love what gets copied.
Do you need a two-part mold for every charm?
No. Flat-backed charms often do great with a one-part push mold. Two-part molds shine when the back needs detail, or when the shape is rounded.
Can you use liquid polymer clay with silicone molds?
Liquid polymer clay is wonderful for filling tiny details, but it needs baking to cure. Some mold-making silicones are not meant to go into an oven, unless the silicone is specifically rated for that temperature range. A safer workflow is to use liquid clay as a detail filler on a clay piece you bake on a proper baking surface. For fun liquid clay ideas, peek at 7 Creative Ways to Use Liquid Polymer Clay.
How many pulls will a silicone mold last?
It depends on the silicone type, mold thickness, and how aggressively it is stretched. Gentle demolding, sturdy walls, and clean storage help molds last longer.
One last note of encouragement
Custom silicone push molds feel like magic because they turn one tiny idea into a whole collection. Start with a simple charm shape, keep your mold box snug, and take your time on the release step for the second half. Then press, peel, and repeat until your batch is as big as your craft table dreams.
When you are ready for more tiny-making adventures, wander through Simple Polymer Clay Octopus Figurine or Whimsical Polymer Clay Mushrooms for Fairy Gardens.