Sensitive ears? Learn which earring metals are safest (titanium, niobium, gold, steel) plus the best polymer clay glues—epoxy, gel super glue, UV resin—and e...
Piercing vs. Drilling Polymer Clay Earring Holes

Dimple
Dimple is the cheerful hamster host of Clay Bakehouse who absolutely loves transforming brightly colored clay into tiny, adorable masterpieces. Whether readers are rolling their very first clay ball or baking delicate custom earrings, Dimple is always there with a warm smile to celebrate every squish and shape.
Published · Last updated
Let’s roll out some colorful clay and make something wonderful today! When it comes to polymer clay earrings, a tiny hole can make a huge difference. A clean, well-placed hole helps your pieces hang straight, keeps jump rings secure, and prevents those heartbreaking little cracks.
The big choice is simple: pierce holes before baking, or drill holes after baking. Both work beautifully when you match the method to your design. Here’s how to choose, plus the exact steps for crisp, professional-looking holes.
Piercing vs. drilling: the quick decision
Use this as a friendly cheat sheet.
- Pierce before baking when your clay is thick enough to hold its shape, you want a fast workflow, and the hole placement is straightforward.
- Drill after baking when you need ultra-precise placement, your design is thin or delicate, or you want the cleanest, roundest hole with minimal distortion.
- Do both when you want a guide hole (light pierce pre-bake) and then perfect the final size after baking (gentle drilling).
Method 1: Piercing holes before baking
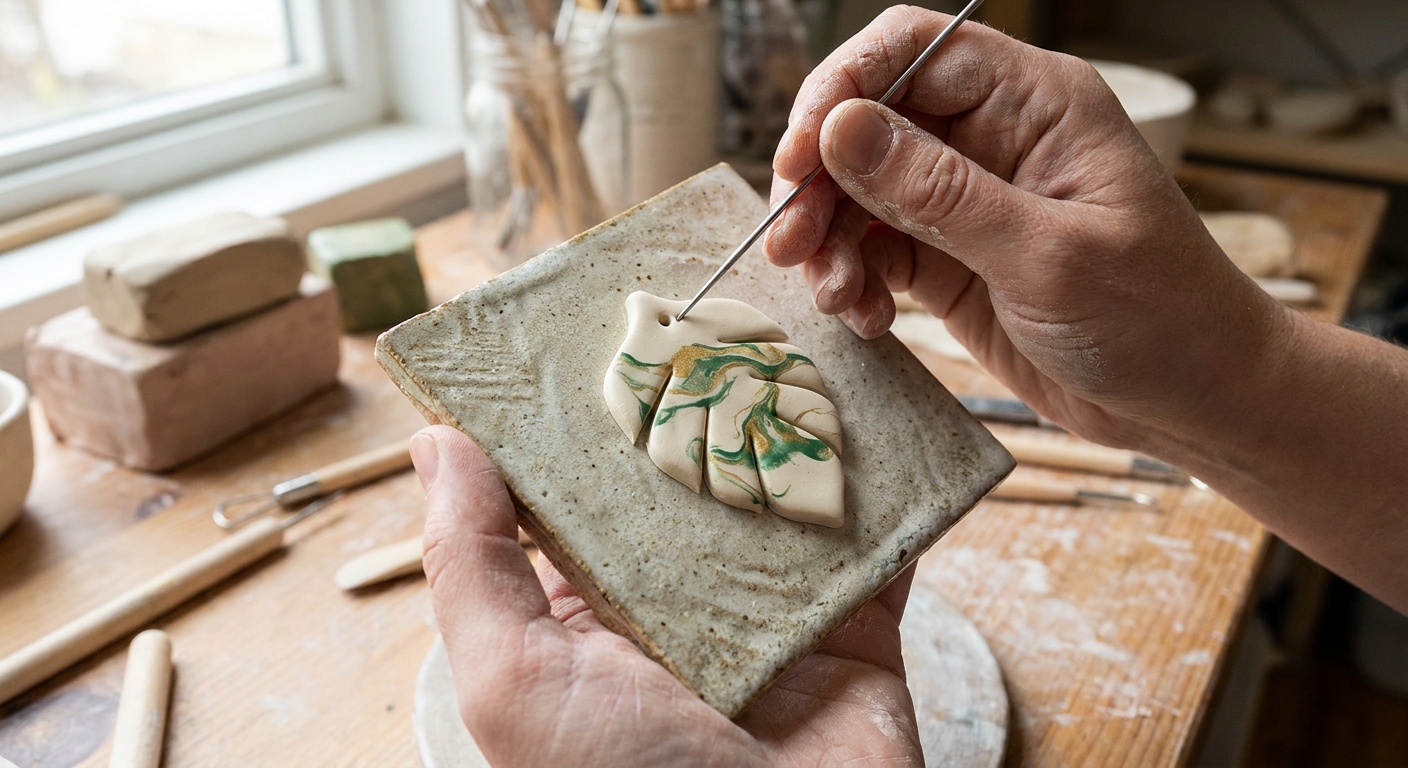
Pre-bake piercing is speedy and satisfying, but it can stretch or deform the clay if the tool is too thick or the clay is too soft. The goal is a clean cut through the clay, not a squish.
Best tools for pre-bake piercing
- Needle tool or pin for tiny holes
- Toothpick for a quick test or very small holes (not always perfectly round)
- Small straw or tiny cutter for larger, round cutouts (works best on thicker pieces)
- Clay blade for trimming and correcting the area around a hole
Steps for clean pre-bake holes
- Chill the piece briefly if it feels too soft. Firmer clay pierces more cleanly and stretches less.
- Support the clay. Leave the shape on a smooth tile or cardstock so the piece does not warp when you lift it.
- Mark placement first. A tiny dimple with a needle is enough to center the tool.
- Pierce straight down with a twist. A gentle twist cuts the hole instead of pushing the clay aside.
- Back the tool out the same way. Pulling at an angle can tear the edge.
- Check the back side. If there is a raised burr, smooth it lightly with a fingertip or a soft tool.
Where to place the hole
As a starting point, aim for a hole that sits centered left to right and a little below the top edge. Too close to the edge can lead to breakage, especially with thin designs. Too low can make the earring tilt forward.
Common pre-bake piercing problems and fixes
- The hole stretched into an oval: The clay was too soft or the tool was pushed through. Chill the clay, twist gently, or switch to drilling after baking for that design.
- Clay “mushroomed” around the hole: Use a thinner tool or rotate as you pierce. Smooth the rim before baking.
- The hole closed up during baking: This can happen with very small holes or soft detail. Make the hole slightly larger than you think you need, or plan to re-open it after baking with a pin vise.
Method 2: Drilling holes after baking
Post-bake drilling is the go-to when you want precision and clean, round holes, especially for thin dangles and detailed shapes. The key is to drill slowly, support the piece, and let the bit do the work.
Best tools for post-bake drilling
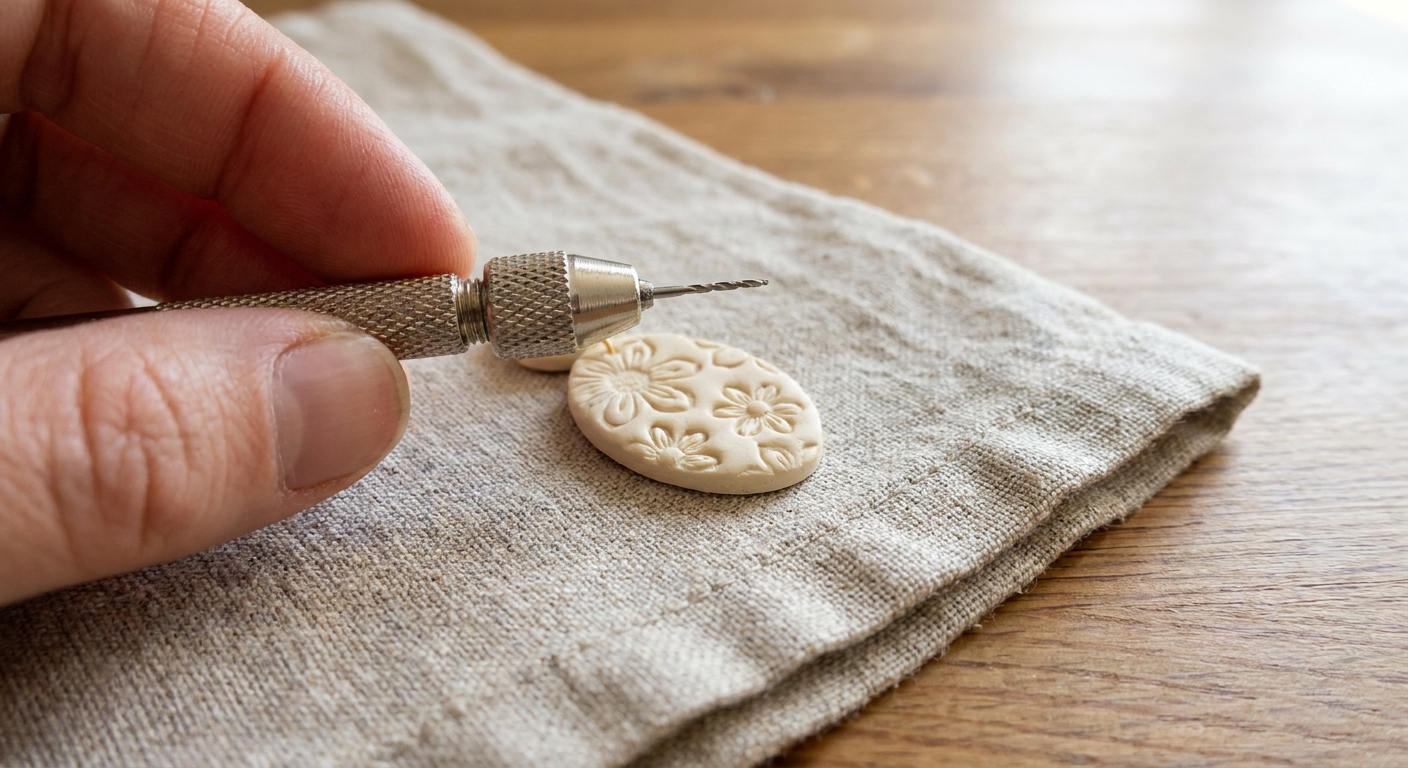
- Pin vise (hand drill): quiet, controlled, and very beginner-friendly
- Micro drill bits: choose a bit size that matches your jump rings or posts
- Rotary tool (optional): fast, but easier to slip, grab, or bind if you push too hard
Safety and grip
Protect your fingers and your finish. Do not drill while holding a tiny piece in midair. Keep it flat on a folded towel, a rubber mat, or a bench block so it cannot spin. If you are drilling lots of pieces, eye protection is a smart habit.
Steps for clean post-bake holes (pin vise method)
- Let pieces cool fully. Freshly baked pieces can be a bit more flexible until cooled, and that can make holes less crisp.
- Mark the spot. Use a pencil dot or a tiny starter dimple with a needle tool.
- Support the piece on a flat surface. A folded towel helps prevent sliding and protects the finish.
- Start with a small bit if needed. For thicker pieces, a pilot hole reduces stress.
- Drill slowly and straight. Use gentle pressure and rotate steadily.
- Clear the dust. Back the bit out occasionally to remove clay shavings.
- Check alignment. If the bit drifts, stop and reassess before widening.
If you prefer a rotary tool
Use a very low speed and a light touch, and keep the piece supported. Heat and cracking usually come from friction and pressure, or when a bit binds and suddenly grabs. Back the bit out often to clear shavings, and let the tool do the work. For many clay earrings, a hand pin vise is the calmer, cleaner option.
Best method by earring style
Thin dangles and lightweight shapes
Drilling after baking usually wins here. Thin clay can warp or stretch when pierced raw.
Chunkier arches, hoops, and thicker statement pieces
Pre-bake piercing works great, especially if you chill first and pierce with a twist.
Textured tops and fragile details near the hole
Drill after baking so you do not smear texture or distort the design while the clay is soft.
Very precise placement
Drill after baking for control, or lightly pierce pre-bake as a guide and finish with a drill bit after baking.
Heavy dangles
If an earring is going to swing a lot or carry extra weight, do not rely on a skinny strip of clay above a hole. Consider a reinforced connection, like an embedded loop or a sturdy connector style, so the stress is not concentrated at the hole.
Hole size tips
Hole size depends on your findings. In general, the hole should be slightly larger than the wire thickness of your jump ring so the ring moves freely without scraping the clay.
- Common earring hole sizes: 1.0 mm for delicate jump rings, 1.5 mm for many everyday jump rings, and 2.0 mm when you want extra wiggle room or use thicker rings. If you are unsure, test on a baked scrap first.
- For jump rings: choose a drill bit that allows easy movement, not a tight squeeze.
- For stud posts: many makers glue posts to the back instead of drilling through, but if you do drill, keep enough clay around the hole for strength.
- For top holes near the edge: leave extra margin so the clay does not tear under movement.
If you are choosing findings and adhesives with comfort in mind, peek at Hypoallergenic Earring Findings and Glues for Polymer Clay.
How to prevent cracks around holes
- Avoid holes too close to the edge. Give the clay a little breathing room.
- Do not force a thick jump ring through a tiny hole. Enlarge the hole instead.
- Use proper baking tools and temperature control. Underbaked clay is more likely to snap. Helpful setup tips live in Essential Oven Tools for Baking Polymer Clay.
- Drill gently. Cracks often come from pressure, not the drilling itself.
- Consider your clay brand and firmness. Different clays behave differently. See Premo vs Fimo vs Cernit Polymer Clay for a friendly overview.
Fixes for hole problems
Messy rim or burrs
Lightly tidy the rim with a sharp blade, fine sandpaper, or a gentle twist of the drill bit by hand. If you sand, wet-sanding keeps dust down and gives a smoother finish. If you plan to glaze, learn how finishes behave in Polymer Clay Glazes Explained.
Hole is off-center
If the piece has enough space, you can carefully drill a new hole in the correct spot and treat the old hole as a design detail, or convert the pair into an asymmetrical set. If you need to hide it, patching with raw clay and rebaking can work for small corrections. For a stronger patch, lightly roughen the baked surface first and use a thin layer of liquid polymer clay between the layers before rebaking.
Hole is too big
Options include using a thicker jump ring, adding a small connector charm, or redesigning the top with a layered accent piece that contains a new hole.
My favorite simple workflow
- Plan placement first. Make sure both earrings match before any holes happen.
- Lightly pierce pre-bake only to mark the center.
- Bake fully following your clay’s package directions.
- Finish the hole size with a pin vise for a crisp, perfectly round opening.
This combo method is especially helpful when clay is very soft or designs are thin.
FAQ
Should I pierce polymer clay earrings before or after baking?
Both are valid. Pierce before baking for speed on thicker pieces. Drill after baking for maximum precision, especially on thin or detailed designs.
Can I use a regular power drill?
It is usually too aggressive for small polymer clay pieces. A pin vise or micro drill setup gives much better control.
Why did my hole close during baking?
The hole may have been very small, the clay may have softened and settled, or the piercing tool may have stretched the clay instead of cutting it cleanly. Make the hole slightly larger pre-bake, or re-open it after baking with a pin vise.
How far from the edge should an earring hole be?
Far enough that there is sturdy clay around it. If the hole sits right at the edge, movement from a jump ring can stress the area and cause breakage. A little extra margin near the top makes earrings much tougher.
If you want more clay-friendly tools for clean cuts and consistent shapes, hop over to Polymer Clay Cutters: Brass, 3D Printed, and Metal. Now go make those tiny holes look extra neat and ready for sparkle!