Make polymer clay surfaces sparkle and pop. Learn how to apply mica powders, soft pastel shading, and acrylic paint—plus the key rule for raw vs baked clay a...
Silkscreen Polymer Clay Earrings

Dimple
Dimple is the cheerful hamster host of Clay Bakehouse who absolutely loves transforming brightly colored clay into tiny, adorable masterpieces. Whether readers are rolling their very first clay ball or baking delicate custom earrings, Dimple is always there with a warm smile to celebrate every squish and shape.
Published
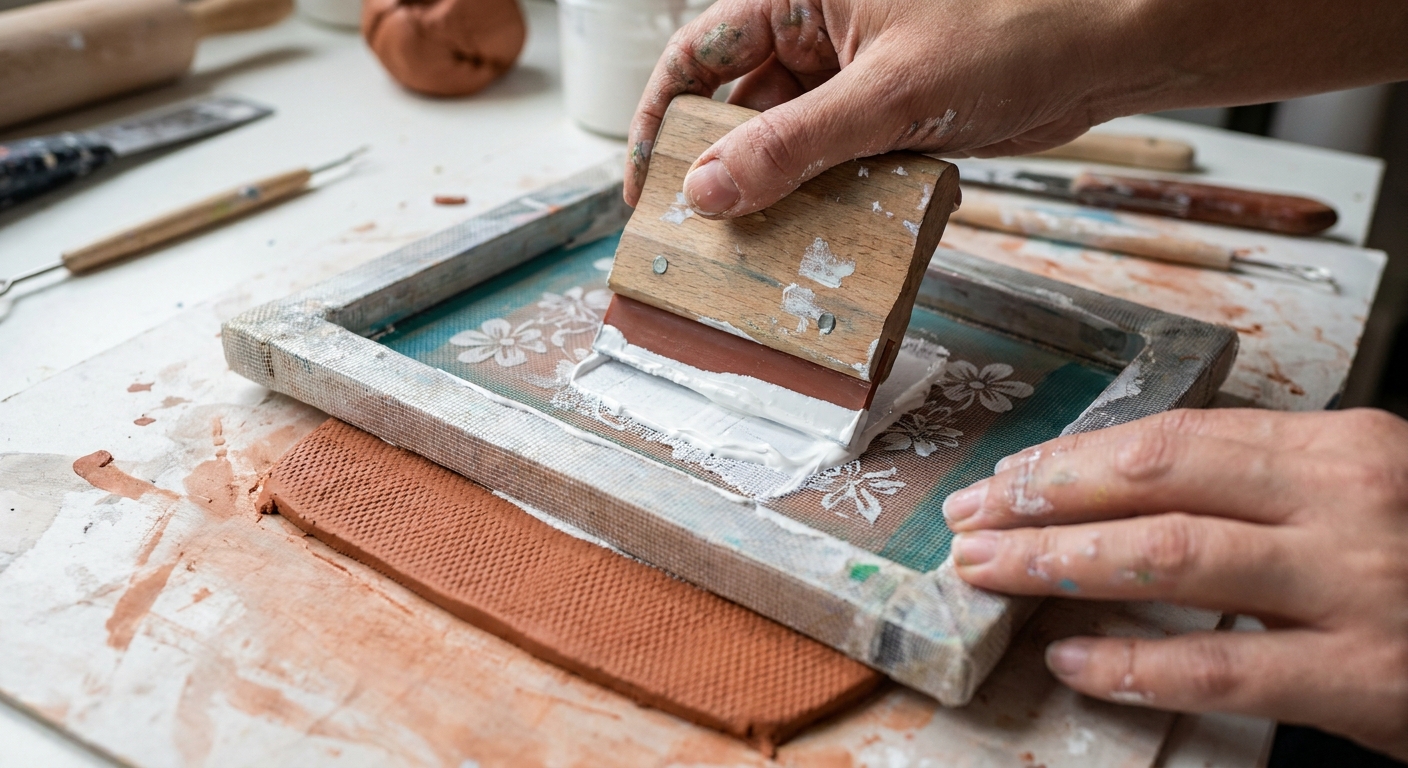
Let's roll out some colorful clay and make something wonderful today! If you love super detailed patterns that look complicated but repeat beautifully, silkscreening on polymer clay is a tiny magic trick. The big idea is simple: lay a reusable silkscreen on your clay slab, pull heavy body acrylic paint (or a screen-printing ink made for crafts) across it, peel, and reveal crisp detail that is perfect for earrings.
Why silkscreens work for earrings
- Intricate lines stay sharp, even on small shapes like studs and dangles.
- Repeatable patterns make matching pairs and mini collections much easier.
- Great on flat slabs, which are ideal for cutting consistent earring components.
- Endless color combos with one screen, just by switching paint colors.
What you need
Tools and materials
- Conditioned polymer clay (any brand you like) rolled into a smooth slab
- Reusable silkscreen designed for crafts (adhesive-backed screens are common)
- Heavy body acrylic paint or acrylic screen-printing ink (thicker products tend to give crisper edges)
- Squeegee or an old gift card
- Plain, fragrance-free baby wipes or damp paper towels for quick cleanup (avoid lotiony wipes that can contaminate clay)
- Nonporous palette (tile, acrylic, glass) for offloading extra paint (scrap paper works, but it absorbs and curls)
- Tape (optional, for hinging or stabilizing the screen)
- Blade for trimming slabs and cutting earrings
- Tile or glass as a work surface
Helpful extras
- Cornstarch (used sparingly) for reducing screen stickiness on delicate clay surfaces
- Brayer or acrylic roller to ensure the slab is evenly attached to the work tile
- Clay smoothing tools for prepping a perfect surface (see How to Smooth Raw Polymer Clay)
Quick note: Cornstarch and water both have tradeoffs. Cornstarch can leave residue that affects adhesion, and water can soften raw clay. If you use either, keep it minimal and test on a scrap first.
Prep your slab
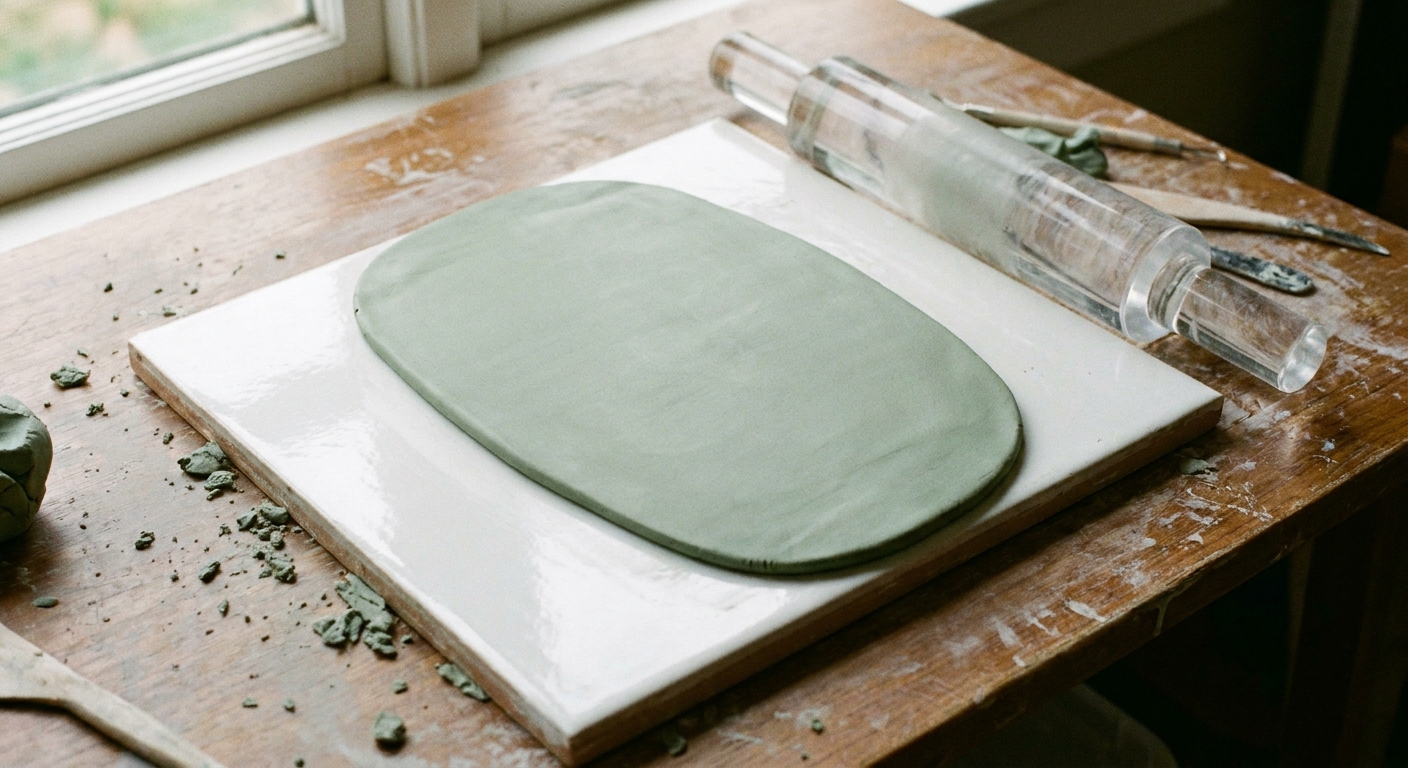
Silkscreens love a slab that is smooth, even, and not too soft. If your clay is super warm or sticky, the screen can pull at the surface when you peel it up.
- Condition the clay until pliable, then rest it for a few minutes if it feels very soft.
- Roll an even slab using a pasta machine or guides. (If you use a pasta machine, this guide helps: Pasta Machines for Polymer Clay.)
- Burnish the slab lightly with a roller from the center outward so it sits flat against your tile and traps less air.
- Smooth the surface before you print. Tiny lint and fingerprints can show through detailed designs.
Silkscreening step by step
1) Position the screen
Place the silkscreen mesh side down on the clay slab. If it is adhesive-backed, press gently so it contacts the clay evenly, especially around fine details.
- Tip for alignment: Make a light pencil mark on the tile, not the clay, so you can repeat placement on future slabs.
- Tip for delicate clay: If the screen feels too grabby, dust the slab with a whisper of cornstarch and brush off the extra. Test first, because too much can reduce paint adhesion.
2) Add paint at one edge
Squeeze out a small line of heavy body acrylic paint (or screen-printing ink) along one edge of the screen. A little goes a long way.
3) Pull paint across the design
Hold the screen steady and use a squeegee or card at a low angle. Pull with firm, even pressure in one direction in one smooth pass. If needed, do one additional pass in the same direction. Try not to go back and forth, which can push paint under fine lines.
- Goal: Fill the open mesh areas without flooding the edges.
- Less is better: Too much paint can squish under the screen and blur details.
4) Scrape off the excess
Use the squeegee to collect extra paint back into a small pile on the screen surface, then offload it onto your palette. This keeps the print crisp and makes cleanup easier.
5) Peel the screen slowly
Lift one corner and peel back slowly and evenly, keeping the peel angle low. This helps prevent lifting clay or smearing wet paint.
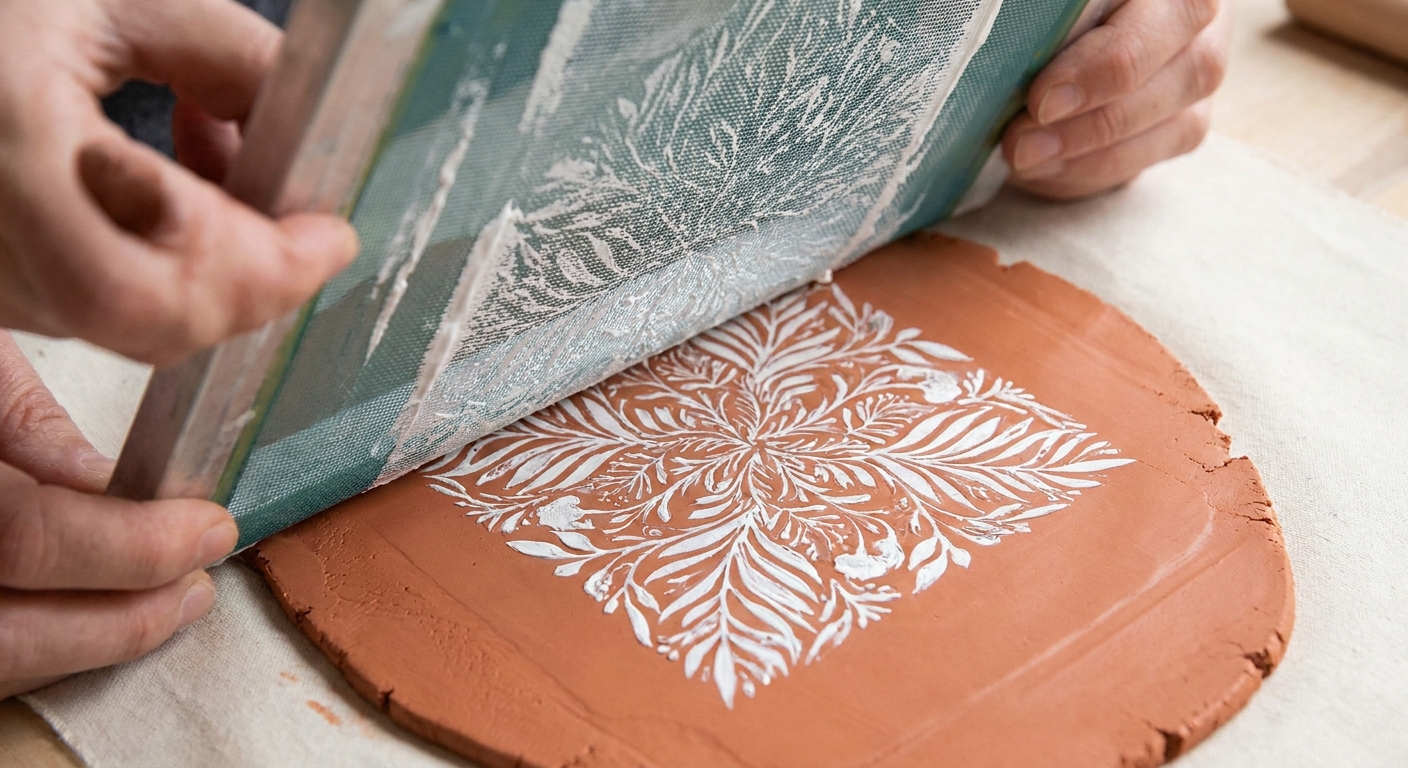
6) Let the print dry before cutting
Let the printed slab rest until the surface is no longer tacky to the touch. Dry time depends on paint thickness and room conditions, but a thinner pull dries faster and stays sharper.
Extra-safe step: Make sure the paint feels truly dry before baking. Some pigments can deepen slightly with heat, so if you are using a new paint color, test a small scrap first.
Cutting earring pieces
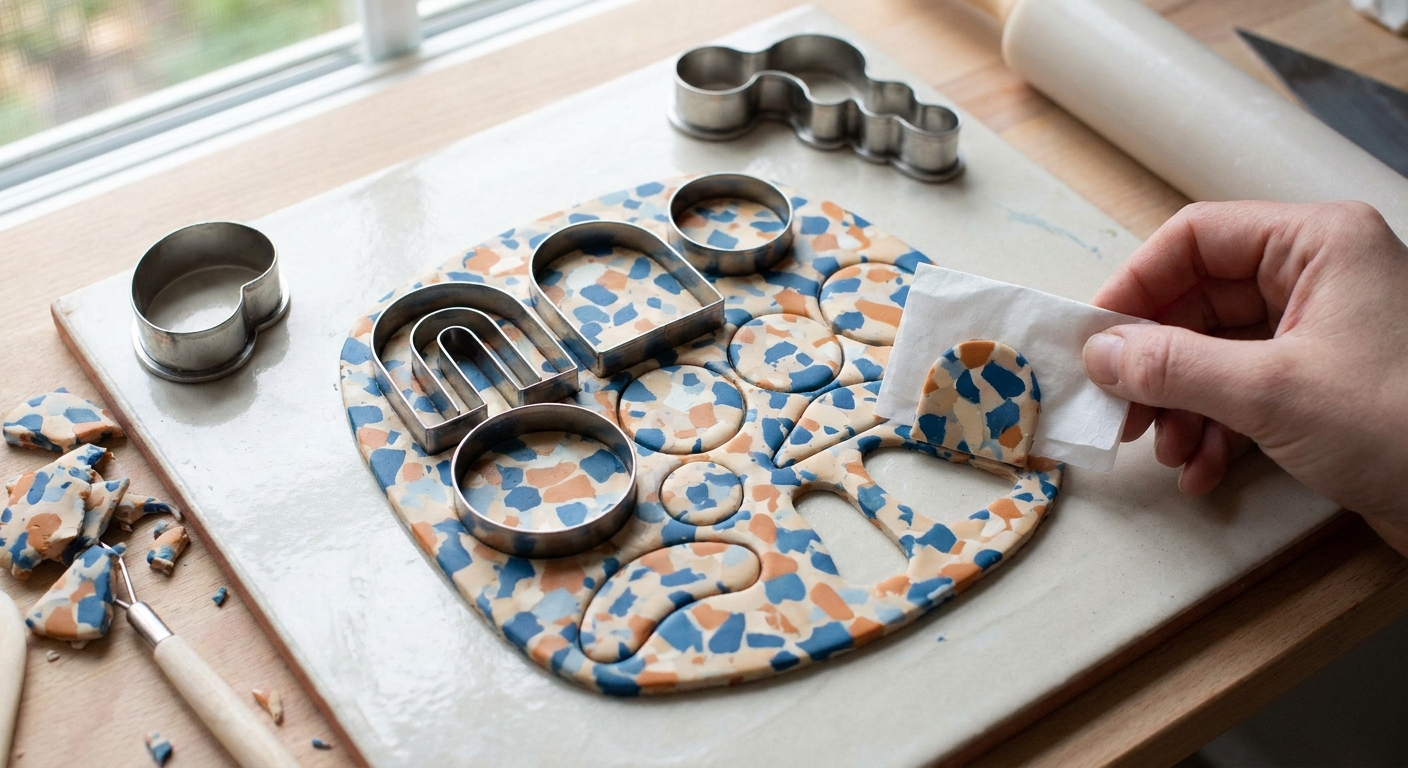
Once the print is set, cut your shapes cleanly so the pattern stays the star of the show.
- Use sharp cutters or a fresh blade for clean edges.
- Plan pattern placement before cutting. Center motifs where you want them on each component.
- Mirror the pair by cutting two shapes from areas of the slab with similar pattern density.
If you are still deciding between piercing holes before baking or drilling after, this guide lays it out clearly: Piercing vs. Drilling Polymer Clay Earring Holes.
Baking and finishing
Bake with steady heat
Follow your clay brand's baking temperature and time. Do not exceed the manufacturer temperature. Even heat helps both the clay and the print look their best. If you'd like a baking setup checklist, visit Essential Oven Tools for Baking Polymer Clay.
Tip: If your oven runs hot, tent the pieces with cardstock or foil (without touching the surface) to help prevent scorching or darkening.
Choose a finish
- Matte look: Often looks great as-is, especially with crisp graphic prints.
- Glossy look: Use a compatible polymer clay glaze. Learn options and tradeoffs in Polymer Clay Glazes Explained.
- Ultra smooth edges: Sand and polish after baking if you want a professional finish. See Sand and Polish Polymer Clay.
Compatibility tip: Some glazes can stay tacky over certain acrylics. If you are trying a new paint or topcoat combo, test it on a baked scrap first.
Pick safe findings and strong glue
For comfortable wear and fewer skin reactions, choose quality posts, hooks, and adhesives. This guide helps: Hypoallergenic Earring Findings and Glues for Polymer Clay.
Design ideas
- Two-tone botanical studs: A leafy screen in white paint on a deep green slab.
- Geometric repeat dangles: Print a tight pattern, then cut simple arches or ovals for a modern look.
- Accent panels: Print only one corner of the slab, then cut shapes so the pattern sits like a fabric trim.
- Layered cutouts: Print a top layer, cut windows, and place it over a contrasting solid color below.
- Gradient backgrounds: Make a smooth gradient slab first, then silkscreen on top. If gradients feel tricky, hop over to Mastering the Skinner Blend.
Troubleshooting
My print looks blurry
- Common causes: Too much paint, too many passes, or pulling back and forth.
- Fix: Use less paint, pull once with firmer pressure, scrape off excess before peeling, and keep extra passes in the same direction only.
The screen lifted my clay
- Common causes: Clay is too soft or sticky, or the screen adhesive is very strong.
- Fix: Let the slab rest to firm up, cool it briefly if needed, or use a very light dusting of cornstarch. Test first and go minimal.
Paint bled under fine lines
- Common causes: Screen not fully in contact with the clay, paint too fluid, or too much paint.
- Fix: Press the screen down gently before pulling paint, and stick with thicker paints or screen inks instead of fluid acrylics.
Paint dried in the screen
- Common causes: Waiting too long between prints or working with very fast-drying paint.
- Fix: Work in small batches, keep a damp paper towel nearby for quick wipe-downs, and clean the screen promptly after your session.
The print cracked after baking
- Common causes: Paint layer too thick, thin pieces that flex a lot, underbaked clay, or an incompatible topcoat that becomes brittle.
- Fix: Use thinner paint pulls, cure the clay fully at the correct temperature and time, and consider a supportive backing layer for very thin earrings. If the piece did crack or break, this repair guide can help: How to Fix Cracked or Broken Baked Polymer Clay.
Clean and store screens
Reusable screens last much longer with quick, gentle cleaning.
- Clean right away with water and mild soap if needed. Acrylic products are much easier to remove before they fully cure.
- Do not scrub aggressively over delicate mesh details. Use soft fingers or a very soft cloth.
- Lay flat to dry on a clean towel.
- Store flat or on the original backing sheet if your screen came with one, keeping dust off the adhesive side.
For general clay storage tips that keep your supplies happy between projects, visit Best Storage for Unbaked Polymer Clay.
Quick checklist
- Smooth, even slab
- Screen pressed down evenly
- Thick paint or screen ink, used sparingly
- One firm pull, minimal re-passes
- Peel slowly at a low angle
- Let paint dry before cutting and baking
- Clean screen promptly
When you're ready to turn that printed slab into a full pair of earrings, you can also browse more ideas in Earrings & Jewelry.