Keep polymer clay figurines from tipping over with 3 easy physics rules, base options (scenic, hidden sole, support buddy), armature tips, and pre/post-bake ...
Best Wire and Armature Materials for Polymer Clay Figurines

Dimple
Dimple is the cheerful hamster host of Clay Bakehouse who absolutely loves transforming brightly colored clay into tiny, adorable masterpieces. Whether readers are rolling their very first clay ball or baking delicate custom earrings, Dimple is always there with a warm smile to celebrate every squish and shape.
Published · Last updated
Let’s roll out some colorful clay and make something wonderful today. When a figurine needs to stand tall, hold an arm out, or stay lightweight, a good armature is the secret ingredient hiding inside the cuteness.
This guide walks through the most useful armature materials for polymer clay figurines, especially aluminum wire, aluminum foil, and a few tapes that help everything stay tidy and strong.
What an armature does (and when you need one)
An armature is an internal structure that supports the clay. It helps with three things:
- Strength: helps thin parts like legs, tails, and arms resist snapping.
- Stability: helps a figure stand up and keeps poses from slumping during baking.
- Lightness: reduces the amount of clay needed, which helps heat move through bulky areas more evenly.
You often want an armature when:
- A figurine is taller than about 2 to 3 inches (5 to 8 cm), especially if it is slender or top-heavy.
- There are skinny projections like ears, horns, fingers, or long tails.
- The pose includes an extended arm or leg.
- The body is chunky and would otherwise be a big, solid mass of clay.
If you are making tiny charms or simple chibi shapes with thick legs and no dramatic pose, you can often skip the armature and sculpt solid. On the flip side, even a 2-inch figure may need support if it has thin extensions.
Aluminum wire: the go-to skeleton
For most polymer clay figurines, aluminum wire is the favorite armature wire because it is lightweight, easy to bend, and it will not rust. It is great for:
- Spines and legs that need to hold weight
- Arms that need a pose
- Looping shapes like tails and tentacles
Which wire gauge works best?
Wire gauge can feel a little confusing because smaller numbers mean thicker wire. For figurines, these ranges are a helpful starting point:
- 20 to 18 gauge: small figurines, thin limbs, delicate details that still need support
- 16 to 14 gauge: medium figurines, most “main skeleton” spines and legs
- 12 gauge and thicker: larger sculptures, heavy poses, or when you want extra stiffness
Two quick notes before you buy a whole spool:
- Gauge labels can vary depending on the system a seller uses, so treat these as rough ranges.
- Test-bend first. If it feels too springy for your pose, go thicker or twist multiple wires together.
Instead of forcing one thick wire into tiny bends, it is often easier to twist two or three thinner wires together. Twisting increases strength and gives the clay something to grip.
Tools that make wire armatures easier
- Needle-nose pliers: for tight bends and small loops
- Wire cutters: for clean cuts (avoid using your nice clay blades)
- Round-nose pliers: handy for making smooth loops for hands, feet, or attachment points
For more general tool planning, the essentials list here pairs nicely with armature building: polymer clay starter kit tools.
Shaping tips that prevent cracks later
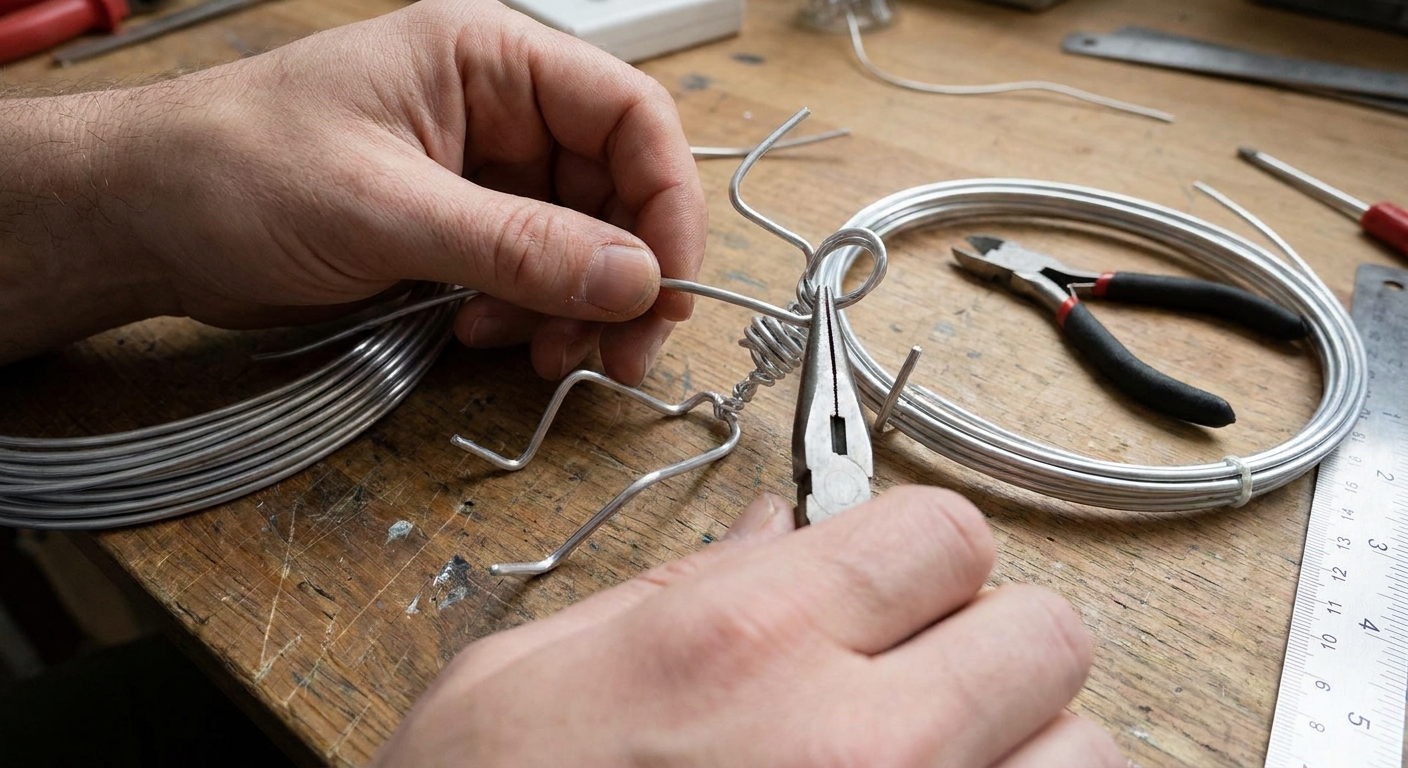
- Make loops on wire ends: sharp cut ends can poke through clay as you sculpt. Fold ends into little loops or hooks.
- Keep wire centered: leave a clay buffer around it. Very thin clay over wire is easier to stress and crack.
- Add shoulders and hips: a simple T shape for shoulders and a triangle or bar for hips helps keep the pose steady.
When aluminum wire is not enough
If a sculpture is large, top-heavy, or needs to hold a dramatic pose, aluminum wire may feel too springy. In those cases, sculptors sometimes use stronger wire types, but they come with tradeoffs.
Other wire options (use care)
Stainless steel wire
Stainless steel wire is stronger and less flexible than aluminum. It can help for bigger sculptures or structural pieces that must resist bending. The downsides are that it can be harder to cut and bend, and it can be slippery inside clay unless you give it some tooth. If you go this route, lightly scuffing the wire with sandpaper or wrapping it (for example, with a thin layer of foil) can help the clay grip mechanically.
Aluminum foil: the lightweight bulk builder
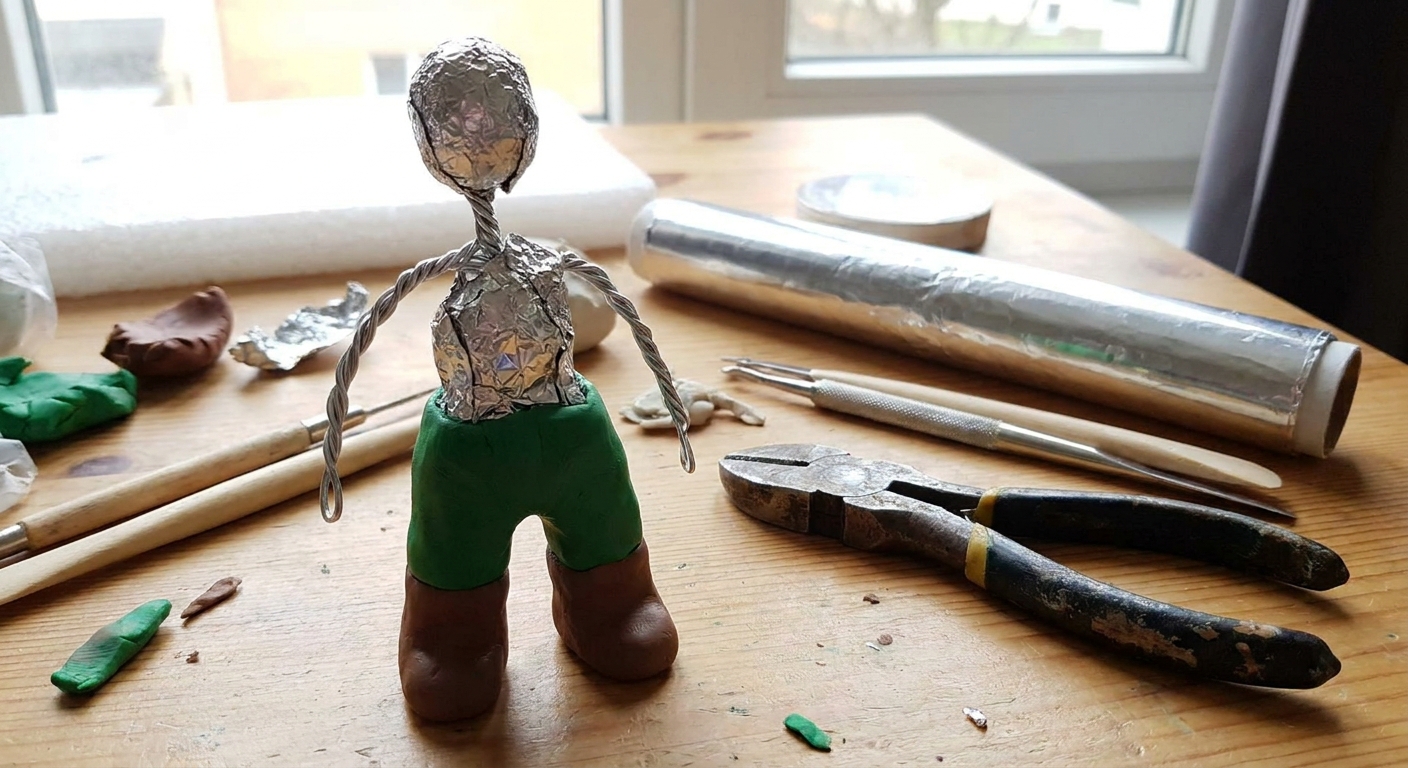
Aluminum foil is the best friend of figurine bellies, heads, and chunky bodies. It bulks out volume without using tons of clay, which helps your sculpture bake more evenly and helps you avoid very thick clay sections.
How to use foil inside polymer clay
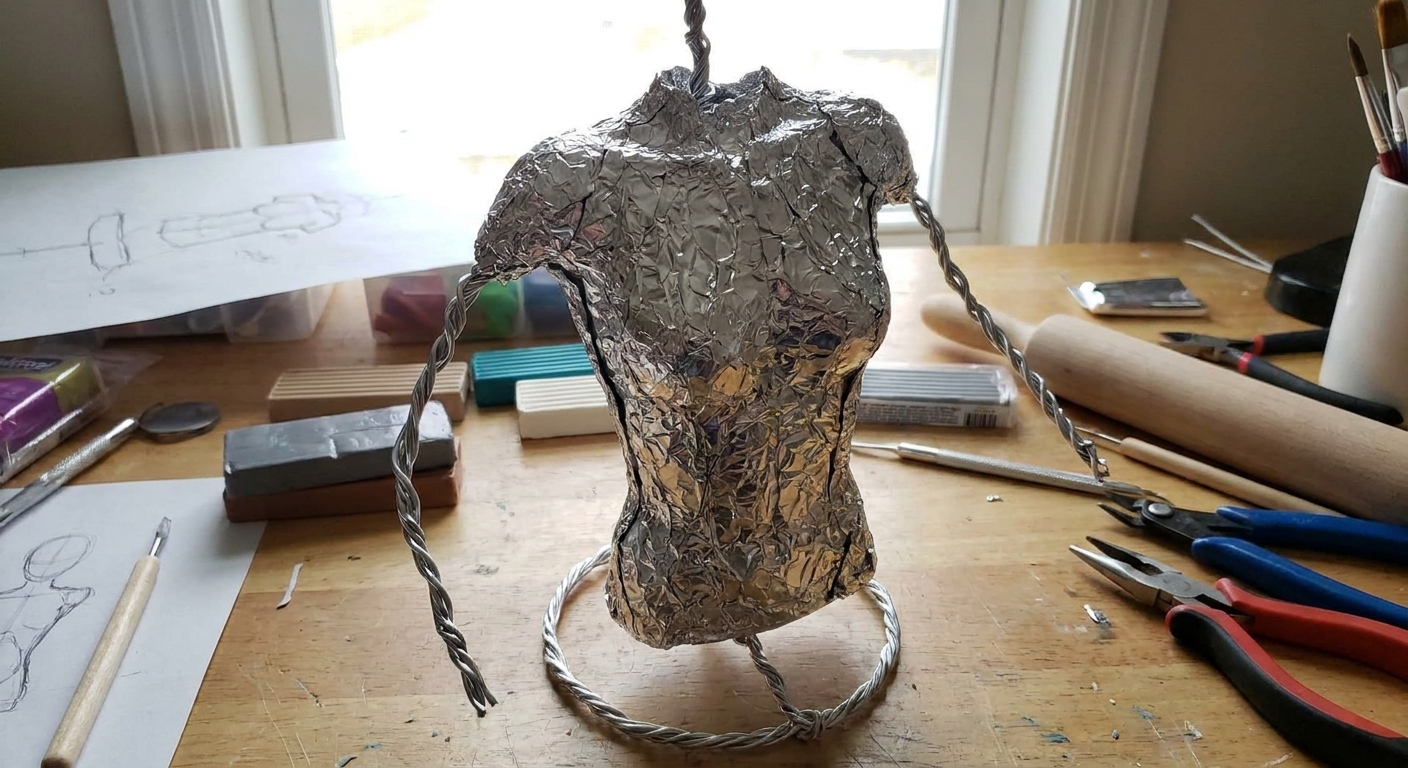
- Compress it firmly: crumple and squeeze it tight. Fluffy foil can shift, which can lead to dents, weak spots, or cracks.
- Build the core shape: oval for torso, ball for head, thicker cylinder for thighs.
- Attach to wire: wrap foil around the wire spine and pinch it snug so it does not spin.
- Cover with clay evenly: aim for a steady clay skin around the form and avoid leaving one area super thick compared to the rest.
A helpful rule: foil is best for big interior areas, while wire is best for thin projections and pose structure. Together, they make a strong, lightweight figurine.
Foil compression and baking safety
Aluminum foil is oven-safe at polymer clay baking temperatures. The key is tight compression plus even clay coverage so heat spreads smoothly through the sculpture. Foil does not magically prevent cracks, but it can reduce stress that comes from very thick clay sections taking longer to heat through.
Tapes and wraps: what to use and what to avoid
Tape is not always required, but it can be very useful for:
- Giving clay extra grip on smooth wire
- Holding foil firmly in place
- Softening sharp wire transitions so clay does not thin out
Good options for polymer clay armatures
- Aluminum foil tape (HVAC foil tape): great for securing foil and smoothing surfaces. Choose plain foil tape without fabric backing.
- Paper masking tape: can add grip and reduce slipping. Use sparingly, keep it fully covered by clay, and consider a small test bake if you are unsure about the tape or adhesive.
Use caution with these
- Plastic tapes (vinyl electrical tape, packing tape): not ideal for baking. Adhesives and plastics can soften, smell, or create weak spots under clay.
- Foam tapes: can compress and create cavities or instability.
A simple wrap strategy
For most figurines, a reliable approach is:
- Wire skeleton for pose
- Tightly compressed foil for bulk
- Small strips of foil tape to lock everything
- Clay skin over the whole form
How to choose the right setup
For small figurines (about 1 to 2 inches)
- 18 to 20 gauge aluminum wire for neck or limbs if needed
- Minimal foil, usually only for heads
- Often no tape required
For medium figurines (about 2 to 5 inches)
- 14 to 16 gauge aluminum wire for spine and legs
- Foil core for torso and head
- Foil tape to stabilize bulk
For larger figurines (5 inches and up)
- Thicker wire or multiple twisted wires for the main structure
- More foil to keep the clay layer reasonable
- Consider anchoring the wire into a base so the feet do not carry all the stress
A quick base tip for tall figures
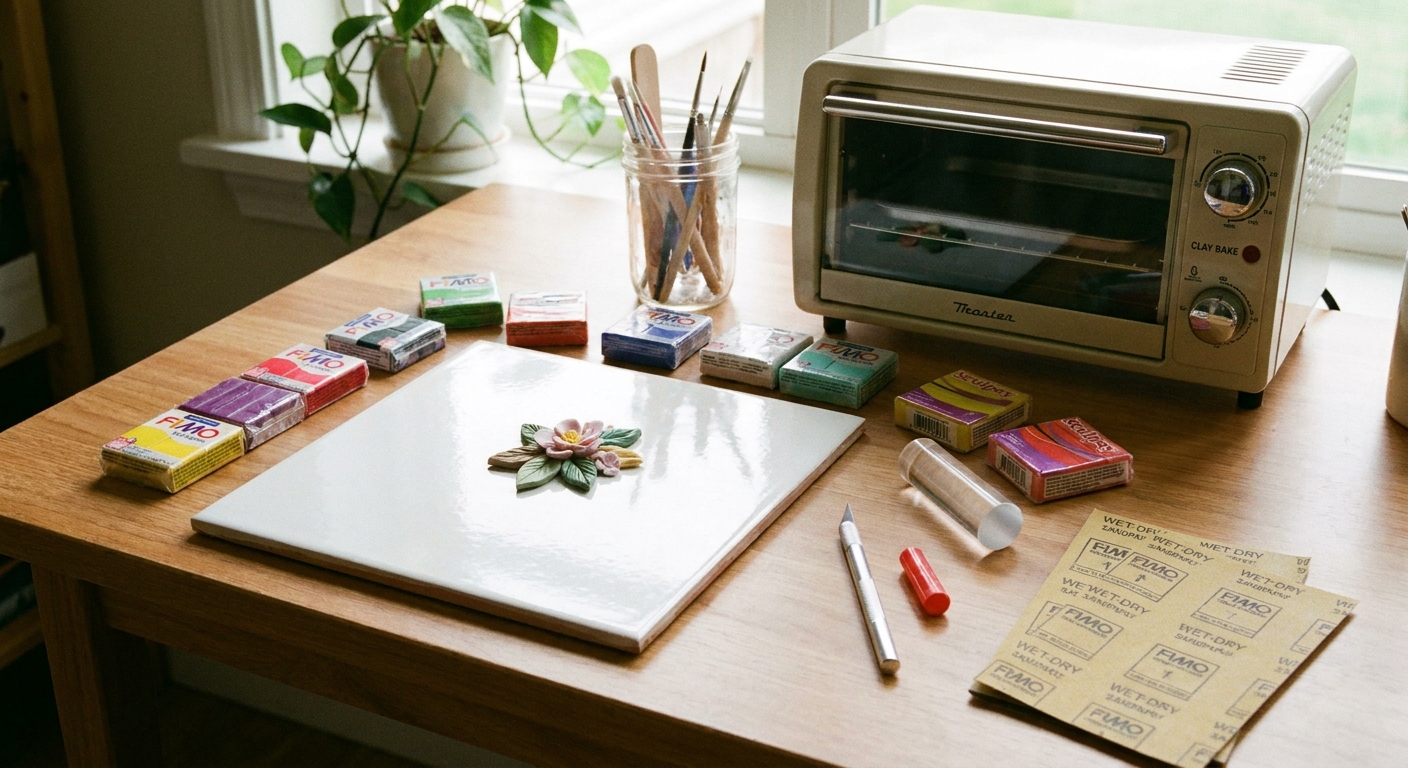
If you are building tall, narrow, or action-pose figurines, anchoring your leg wires into a simple base (like a ceramic tile) can make sculpting and baking much less wobbly. Bend the foot wires into flat “L” or “U” shapes and secure them under a small clay pad, then cover and blend once the pose feels stable.
If you love figurines, hop over to Charms & Figurines for more sculpting-friendly projects and ideas.
Do’s and don’ts for clean bakes
Do
- Keep clay thickness even over the armature when possible.
- Press clay firmly onto the armature to avoid trapped air pockets.
- Reinforce joints where stress loves to form (neck, shoulders, hips, ankles). A small clay collar wrapped around a limb joint, pressed and blended well, can add a surprising amount of strength.
- Use a stable baking setup so delicate parts do not sag. A bed of baking soda or fiberfill can help support shapes.
- Bake at your clay brand’s recommended temperature and time. Armatures do not change the bake settings, but overheating can cause darkening and brittleness. (If you are still picking a brand, see Premo vs Fimo vs Cernit polymer clay.)
Don’t
- Leave sharp wire ends close to the surface.
- Rely on plastic tape inside a piece you plan to bake.
- Make a huge solid clay core when foil would do. Very thick solid areas can heat unevenly and create stress.
For more baking and safety basics, the oven setup guide here is a helpful companion: essential oven tools for baking polymer clay.
Quick FAQ
Can polymer clay be baked over aluminum wire and foil?
Yes. Aluminum wire and aluminum foil are commonly used inside polymer clay figurines and are oven-safe at typical polymer clay temperatures. The most important things are tight foil compression and complete clay coverage.
Why did my figurine crack over the armature?
Common causes include uneven clay thickness, foil that was not compressed firmly, clay that was not pressed snugly onto the core (air pockets), weak joins, or thin clay stretched over a sharp bend. Smoothing transitions and keeping a steady clay skin helps a lot.
Do I need tape at all?
Not always. Tape is most useful when you need to secure foil to wire or add grip. If your clay grips well and your foil is locked in tightly, you can often skip it.
What if my wire keeps shifting while I sculpt?
Add twist to the wire, build small loops at joints, and use a little foil tape to lock foil pieces so the armature becomes a single solid unit before you add clay.
One sweet armature recipe
If you want a simple default that works for lots of cute figurines, keep this in your toolkit:
- Aluminum wire for the pose and limbs
- Tightly compressed aluminum foil for body and head volume
- Small amounts of foil tape to secure and smooth the core
Once the inside is sturdy, the outside can be as tiny, charming, and expressive as you dream it to be.