A practical guide to picking a clay-dedicated pasta machine and using it well: setup, thickness settings, conditioning steps, and quick fixes for ripples, te...
Polymer Clay Extruder Guide

Dimple
Dimple is the cheerful hamster host of Clay Bakehouse who absolutely loves transforming brightly colored clay into tiny, adorable masterpieces. Whether readers are rolling their very first clay ball or baking delicate custom earrings, Dimple is always there with a warm smile to celebrate every squish and shape.
Published · Last updated
Let's roll out some colorful clay and make something wonderful today! If you have ever wished for perfectly even hair strands, tidy vines, or those satisfyingly smooth retro ropes, a polymer clay extruder is the tool that makes it feel almost magical.
What a clay extruder does best
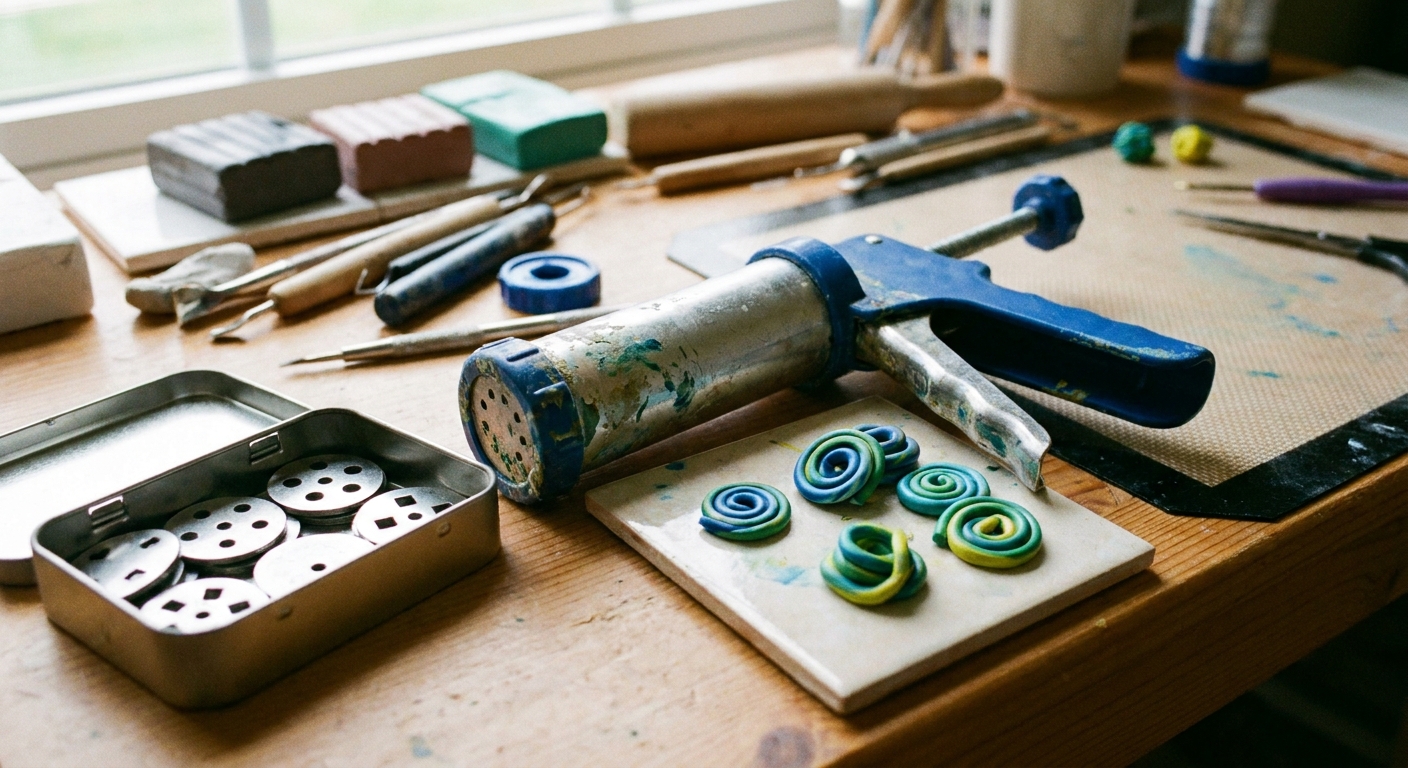
A polymer clay extruder pushes conditioned clay through a shaped disc, creating long, uniform strands. That consistency is the big win. It is especially helpful for details that look messy when rolled by hand.
- Hair and fur: thin strands for dolls, figurines, gnomes, monsters, or animal manes.
- Vines (straight or curled): smooth ropes to wrap around jars, frames, miniature planters, or charm bases.
- Retro shapes: thicker ropes, half-moons, squares, and multi-hole "spaghetti" strands for 60s and 70s inspired patterns.
- Trim and borders: consistent edging for plaques, name tags, or jewelry components.
If you love surface details, pair your extruder work with texture and finishing steps from Techniques & Finishing.
Before you extrude
Most extruder frustration comes from clay that is too stiff, too crumbly, or too cold. Conditioning is not optional here. It is the difference between smooth strands and a jam.
How soft should the clay be?
For clean extrusion, aim for clay that feels pliable and slightly warm, like it would roll into a snake without cracking. If it crumbles, it needs more conditioning.
Gentle ways to warm clay
- Hand warmth: knead and fold until the clay feels flexible.
- Short rest in a pocket or under a warm lamp: warmth, not heat.
- Pasta machine passes: rolling and folding builds softness evenly. See Pasta Machines for Polymer Clay for conditioning tips.
Keep it safe: avoid microwaves for warming raw clay, since they can create hot spots that start curing or scorching in random places. Ovens are meant for controlled baking at the correct temperature, not quick warming. If you accidentally start curing the clay in bits, those little firm crumbs can clog an extruder fast.
Clay nuance: very firm lines may need extra conditioning (or a little mix-in of softer clay), and very soft lines can feel sticky and squishier in tiny discs. Adjust softness and disc size together and you will feel the difference immediately.
Extruder parts and jams
Even though extruders come in different styles, they all work the same way: a barrel holds clay, a disc shapes the output, and a plunger forces clay through.
Common reasons an extruder jams
- Clay too firm for the disc size.
- Disc holes too tiny for the clay softness.
- Air pockets inside the barrel.
- Bits of cured clay stuck in the disc holes.
- Twisted or uneven loading that makes the clay shear and wedge.
A quick hand-safety note
Extruders can need a surprising amount of torque. If your wrist or hand starts complaining, pause. Switching to a larger disc, softening the clay, or working in smaller loads is usually more effective than muscling through.
How to load an extruder
Neat loading prevents squishy problems later.
- Choose your disc first. The disc controls how much resistance you will feel. Smaller holes equal more pressure required.
- Make a tidy clay log. Roll a cylinder slightly smaller than the barrel so it slides in cleanly.
- Pack the barrel firmly. Press the clay in so there are no gaps. Air pockets can cause the strand to sputter or split.
- Seat the disc snugly. Make sure it sits flat and fully aligned before tightening.
- Start with steady pressure. Slow and consistent pressure gives the cleanest strand.
If the first bit looks rough or cracked, stop and recondition the clay rather than forcing it. Forcing usually makes the jam worse.
Pick the right disc
Discs can be simple circles and squares or more decorative profiles. The trick is matching the disc to the job and to the clay softness.
Hair strands
- Best discs: small round holes, or multi-hole discs for many strands at once.
- Clay softness: soft and very well conditioned.
- Pro tip: extrude onto a clean tile or paper, then cut into manageable lengths before applying.
Vines and ropes
- Best discs: medium round holes, twisted-rope style discs, or half-round profiles for raised trim.
- Clay softness: medium soft. Too soft can flatten when you pick it up.
- Pro tip: if you want a curled vine, lay the strand down and coax it into curves with a needle tool instead of lifting it and stretching.
Retro shapes
- Best discs: squares, triangles, half-moons, thick round ropes, or multi-strand "spaghetti".
- Clay softness: medium. Firm enough to hold sharp edges.
- Pro tip: keep your strands consistent in thickness, then slice and arrange like tiles for quick pattern work.
Prevent distortion
Extruded clay is easy to accidentally stretch. Stretching thins the strand and can turn round output into flat, uneven noodles.
- Support the strand as it exits. Let it rest on your work surface instead of pulling it outward.
- Cut, do not yank. Use a blade to cut cleanly when you reach the length you want.
- Work in short lengths. Long strands are harder to manage without stretching.
- If the strand has a flat side: rotate it gently between fingertips on the table to round it again, or re-extrude with slightly softer clay.
Attach details cleanly
Extruded parts are usually thin, so good contact matters. Press too hard and you squash the shape. Press too lightly and it may lift later.
Best ways to bond
- Fresh-on-fresh: attach extruded raw clay onto raw base clay whenever possible.
- Light pressure plus blending: use a soft brush, silicone tool, or fingertip to gently coax edges down without crushing the strand.
- Texture helps: a slightly textured base can give the strand more grip.
If you need smoother joins, the tricks in How to Smooth Raw Polymer Clay are perfect for taming fingerprints and seam lines around tiny details.
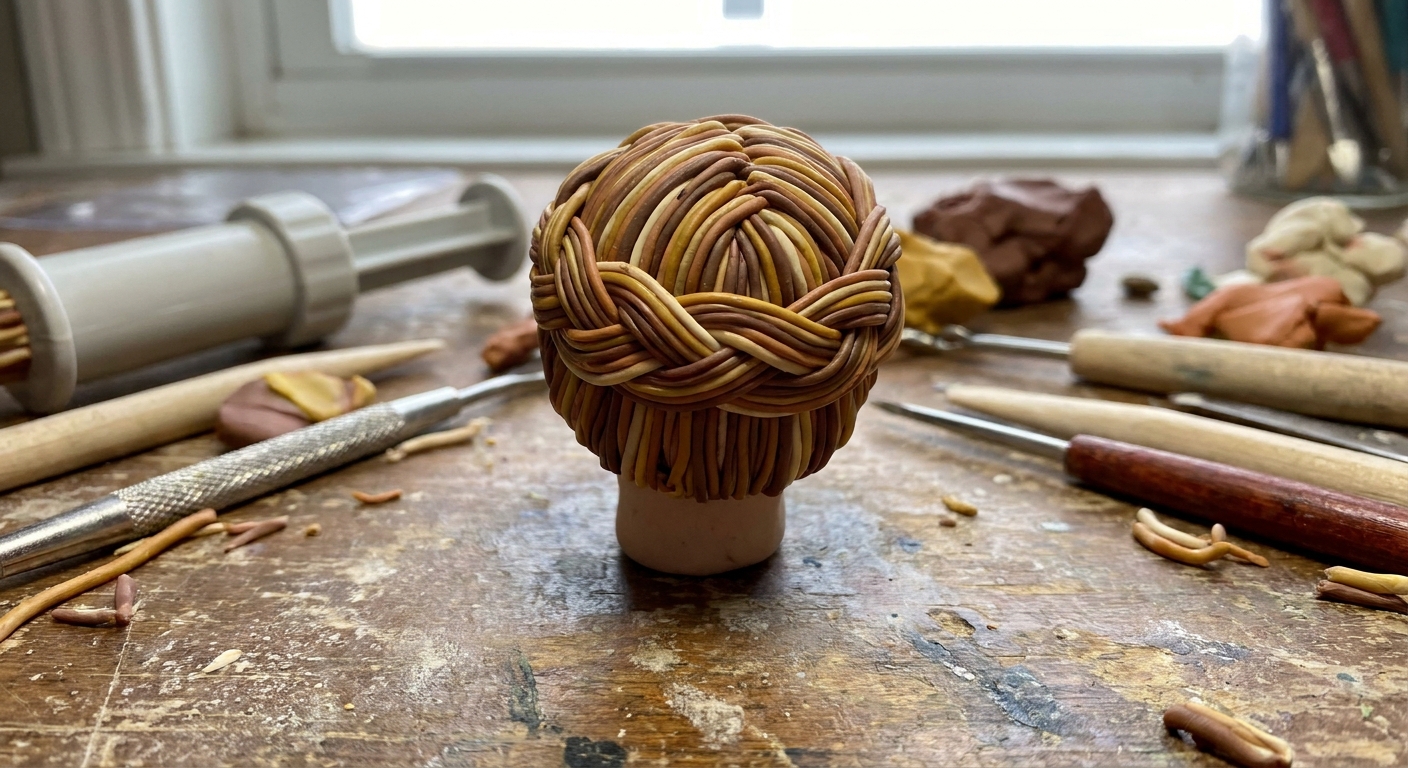
Tiny hair and fur
Uniform strands are great, but realistic hair needs a little planned messiness.
- Mix strand sizes: use two disc sizes, or extrude and then split a few strands lengthwise for variety.
- Layer like shingles: start from the bottom (near a neckline or scalp edge) and overlap upward.
- Create part lines: place strands in opposite directions, then lightly press at the part so it looks intentional.
- Add movement: curve a few strands away from the face or outward at the ends for bounce.
Extruder troubleshooting
The strand cracks or looks crumbly
- Condition longer.
- Warm the clay slightly with hand warmth.
- Switch to a slightly larger disc.
It is taking tons of force
- Clay is too firm, or the disc is too small.
- Unload, soften the clay, and reload. Avoid forcing it.
- If your hands are straining, stop and reset. Your extruder will still be there in five minutes.
The strand is uneven
- Air pockets are likely. Pack the barrel more firmly.
- Apply slow, consistent pressure.
The disc holes clog
- Check for tiny cured bits. Clean the disc thoroughly.
- Avoid hot spots when warming clay. Little partially cured specks behave like tiny pebbles in the barrel.
The strand twists when you do not want it to
- The clay log may be unevenly loaded. Reload with a straight, smooth cylinder.
- Extrude more slowly and support the strand as it exits.
Cleaning and storage
A clean extruder is a happy extruder. Dried crumbs and partially cured bits are a very common cause of future jams.
- Clean after each color session: disassemble and wipe the barrel and plunger.
- Purge the barrel: before you fully disassemble, you can extrude a small scrap log of a neutral color (or translucent) to push out the leftovers from the previous color.
- Clear tiny disc holes gently: a toothpick or soft brush can nudge clay out of holes without scratching.
- Store discs together: keep them protected so they do not get nicked, warped, or buried under heavier tools.
For general raw-clay storage habits, Best Storage for Unbaked Polymer Clay has helpful do and do not tips.
Mini projects to practice
Want a quick way to build confidence with your extruder? These are small, satisfying, and very forgiving.
- Vine-wrapped pendant: extrude a medium rope, wrap it around a flat clay oval, then add tiny leaf textures with a needle tool.
- Retro rope studs: extrude a thick rope, coil it into a tight spiral, then slice two matching rounds for stud tops. After baking, attach posts with a glue made for polymer clay and metal. If you want a deeper dive on skin sensitivity and adhesives, see Hypoallergenic Earring Findings and Glues for Polymer Clay.
- Whimsical figurine hair: extrude thin strands, cut into short pieces, and layer into a bob or fringe.
If your practice turns into jewelry, the guides in Earrings & Jewelry are a sweet next stop.
Extruder FAQ
Can any polymer clay brand go in an extruder?
Most can, as long as the clay is well conditioned and soft enough for the disc size. Some firm lines may need extra conditioning and warmth, and some very soft lines may need a slightly larger disc. If you are choosing clay for detail work, Premo vs Fimo vs Cernit Polymer Clay can help you compare characteristics.
Do I need release or cornstarch in the extruder?
Usually no. If clay is sticking badly, it can be a sign it is too soft or too warm, or that there is residue in the barrel or disc. Focus on conditioning, disc size, steady pressure, and a clean extruder before adding anything that could affect bonding later.
Should I bake extruded strands before attaching?
Most of the time, attach raw-to-raw and bake together so they fuse. Prebaking can be useful for rigid elements, but it is less forgiving when you need curves and natural flow.
Why do my strands look fuzzy or rough?
Roughness can come from under-conditioned clay, tiny cured bits in the disc, residue in the barrel, or stretching while handling. Conditioning and gentle handling usually solve it quickly.
Hamster-sized pep talk
An extruder can feel stubborn at first, but it is really just honest. When the clay is warmed, conditioned, and packed well, those perfect strands appear like clockwork. Start with a larger disc, go slow, and celebrate every smooth little noodle that pops out.